How to Choose Printers for Business Cards: A Step-by-Step Buying Guide for First-Timers
New to ordering business cards? Follow our practical step-by-step guide to choosing the right printers for business cards and avoiding costly mistakes.

Written by
Rosie Brown
Stationery & Office
A First-Timer’s Roadmap to Getting Business Cards Right
Ordering business cards for the first time feels straightforward — until you’re staring down a supplier’s order form, confronted with terms like GSM, bleed zones, PMS colours, and laminate finishes, with no idea what any of it means. Make the wrong call and you end up with 500 cards that feel flimsy, print muddy, or arrive too late for the industry event you needed them for.
The good news? Choosing the right printers for business cards isn’t complicated once you understand what actually matters. This guide breaks the entire process into clear, numbered steps — from defining what you need before you even contact a supplier, right through to inspecting your finished order when it arrives. Whether you’re a sole trader in Adelaide setting up your first consultancy or an office manager in Sydney coordinating a rebrand for a fifty-person team, this process works.
Step 1: Define Your Purpose and Volume Before You Do Anything Else
The biggest mistake first-time buyers make is jumping straight to “how much will this cost?” before they’ve worked out what they actually need. Your purpose and volume will determine everything — the printing method, the card stock, the finish, and the realistic budget.
Ask yourself these questions before approaching any supplier:
- How many cards do you need? Are you printing 100 cards for a small networking run, or 1,000+ for a full team rollout?
- Who is receiving these cards? Cards handed out at a high-end Melbourne property auction carry different expectations than cards given out at a community market stall.
- What do you want the card to do? Is it purely a contact-sharing tool, or is it a premium brand statement that should feel impressive in the recipient’s hand?
- Do you have time pressure? If you’re three days out from a Brisbane trade expo, your options narrow considerably.
Answering these questions honestly will save you from overspending on luxuries you don’t need — or underspending in ways you’ll regret when the cards arrive looking underwhelming.
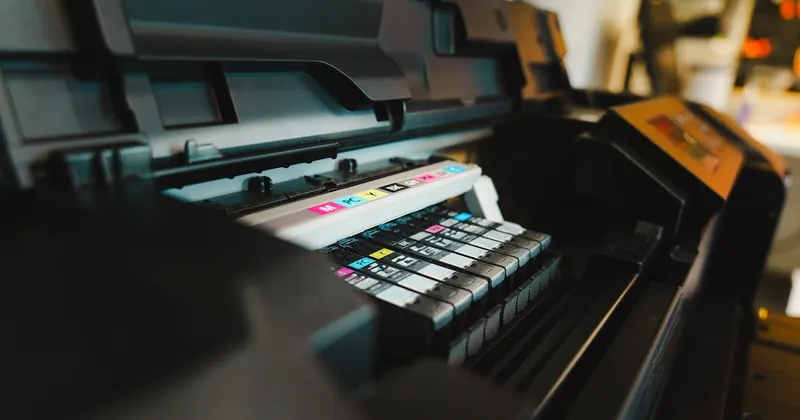
Step 2: Learn the Two Main Printing Methods (and Know Which One You Need)
Printers for business cards generally use one of two methods: digital printing or offset printing. Understanding the difference is non-negotiable, because choosing the wrong one for your situation costs real money.
Digital Printing
Digital printing works much like a high-end laser or inkjet printer — it transfers your design directly from a digital file onto the card stock. It’s faster, more affordable at lower volumes, and widely available from online and local suppliers across Australia.
Best for: Orders under 500 cards, quick turnaround times, designs with photographic elements or gradients, and tight budgets.
Watch out for: Slight colour variation between batches, which matters if you’re reprinting and need to match previous cards exactly.
Offset Printing
Offset printing uses physical plates to press ink directly onto the stock. The setup cost is higher, which is why it’s generally only cost-effective for larger runs (typically 500 cards or more). But the output is noticeably sharper — crisper text edges, deeper colour saturation, and more consistent results across the entire print run.
Best for: Large volumes, brand-critical applications where Pantone colour matching is required, and premium client-facing roles such as law firms, financial advisers, and real estate agencies.
Watch out for: Longer lead times due to plate preparation, and minimum quantity thresholds that may not suit small businesses.
A quick rule of thumb: if you’re printing fewer than 500 cards and your design involves complex photography or gradients, go digital. If you’re printing 500 or more cards and colour consistency is critical to your brand, offset is worth the extra investment.
Step 3: Choose Your Card Stock and Weight
The physical feel of a business card communicates something about your brand before the recipient even reads a single word. Handing over a thin, flimsy card sends an unintentional message — and not a good one.
Card stock weight is measured in GSM (grams per square metre). Here’s a practical breakdown:
- 300–350 GSM: This is the entry-level territory for professional business cards. Acceptable for budget-conscious orders, but won’t feel premium.
- 400 GSM: The sweet spot for most professional applications. Feels substantial, holds well over time, and is widely available from reputable Australian printers.
- 450–600 GSM: Reserved for premium applications, double-sided laminated cards, and situations where the physical impression of the card is as important as the information on it.
Beyond weight, consider the substrate itself. Standard coated stock is the most common and cost-effective. Uncoated stock has a matte, textural feel that suits creative industries and trades who want a more tactile, handcrafted impression. Specialty stocks — including kraft, cotton, and synthetic materials — are available through premium suppliers for those who want to stand out in a competitive environment.
Step 4: Understand Finishing Options (and Don’t Over-Order Them)
Finishing is where first-time buyers frequently over-complicate things. A glossy laminate, a spot UV coating, or foil stamping can elevate a business card dramatically — but they also add cost, extend production timelines, and aren’t always appropriate for every business type.
Here’s a practical overview of the most common options:
Gloss Laminate
Adds a shiny, protective coating to one or both sides of the card. Makes colours pop and increases durability. A solid choice for vibrant designs but can make handwriting difficult if you ever need to jot a note on the back of a card.
Matte Laminate
Creates a smooth, non-reflective surface that feels sophisticated and is easier to write on. Particularly popular in professional services sectors including finance, law, and healthcare.
Spot UV
A clear, high-gloss coating applied selectively to certain elements of the card — typically a logo or key graphic. Creates a striking contrast when used on a matte base. Adds cost but delivers a genuinely impressive result when done well.
Foil Stamping
A metallic foil (gold, silver, rose gold, and others) heat-pressed onto the card surface. Visually impressive and highly tactile, but it’s a premium add-on with a premium price tag. Best reserved for situations where the card itself is part of the brand experience.
The practical advice: If you’re ordering for the first time, start with matte or gloss laminate on a quality stock. See how they perform in real-world use before committing to more expensive specialty finishes on a large run.
Step 5: Prepare Your Artwork Correctly
Poor file preparation is one of the most common — and entirely avoidable — causes of disappointing print results. Many first-time buyers submit low-resolution files, forget to include bleed areas, or provide RGB colour profiles when the printer requires CMYK.
Follow these artwork preparation basics before submitting your files to any supplier:
- Set your resolution to 300 DPI minimum. Screen-resolution images (72 DPI) will print blurry. This is non-negotiable.
- Convert colours from RGB to CMYK. RGB is designed for screens; CMYK is the standard for print. Colours can shift noticeably during conversion, so do this in your design software before finalising your artwork.
- Add a bleed area. Standard business card bleed is 3mm on all sides beyond the card’s trim edge. This ensures that background colours and images extend to the card’s edge without leaving white borders after cutting.
- Keep critical content within the safe zone. Text and logos should sit at least 3mm inside the trim line to avoid being cut off.
- Supply files as print-ready PDFs. Most reputable printers for business cards will accept PDF/X-1a or PDF/X-4 formats. If you’re unsure, ask the supplier for their preferred file specifications before you finalise your design.
If you’re working with a graphic designer, brief them on these requirements from the outset. If you’re using a template provided by the printer, build your design within it rather than adapting an existing design to fit afterwards.
Step 6: Vet Your Supplier Properly
Not all printers for business cards offer the same level of quality, communication, or reliability. Choosing a supplier based on price alone is a common pitfall that leads to disappointment.
When evaluating suppliers, look for:
- Physical samples or a sample pack. Any credible supplier should be able to provide printed samples so you can assess quality before committing to a full order. If they can’t or won’t provide samples, that’s a red flag.
- Clear turnaround times in writing. “Approximately 5–7 business days” and “guaranteed delivery by [date]” are very different statements. For time-sensitive orders ahead of a conference or product launch, get the timeline confirmed in writing.
- A proofing process. A reputable supplier will provide a digital proof — and ideally a physical proof for large or premium orders — before printing the full run. Never approve a job without reviewing a proof.
- Australian-based customer support. If something goes wrong with your order, you want to speak to someone local who can resolve it quickly, not submit a support ticket to an overseas team and wait three days for a response.
- Transparent pricing with no hidden fees. Setup fees, artwork adjustment fees, and delivery charges can significantly inflate the price beyond the advertised per-card rate. Request a complete quote upfront.
Step 7: Review Your Proof Carefully — Then Review It Again
The proof stage is your last opportunity to catch errors before they’re printed on 500 cards. First-time buyers often rush through this step, approving a proof quickly without checking it thoroughly.
When reviewing your proof, check:
- Every phone number, email address, and website URL — digit by digit
- Job title and name spelling, including any unusual capitalisation or hyphenation
- Physical address details, including postcode
- Colour accuracy compared to your brand guidelines
- That no text or design elements are being cut off near the card edges
- That the back of the card (if applicable) is oriented correctly
If anything looks off — even slightly — query it with the supplier before approving. Once you approve a proof and the job goes to press, reprinting due to an error you missed is generally at your own cost.
Step 8: Inspect Your Order When It Arrives
When your cards arrive, don’t just open the box and assume everything is fine. Take five minutes to properly inspect the order before storing or distributing them.
Check a sample from different parts of the box for:
- Consistent colour across the batch
- Clean, straight cut edges without obvious ragged borders
- No visible smudging, scratching, or delamination
- Correct stock weight and finish matching what you ordered
If you identify a problem — particularly a systematic one affecting multiple cards — contact your supplier immediately with photographic evidence. Reputable suppliers will work with you to resolve the issue, whether that means a reprint or a partial refund.
Common Pitfalls Summary
Before you place your first order, keep these pitfalls in mind:
- Choosing price over quality at the proof stage, then regretting it when the cards arrive
- Underestimating volume and paying more per card in a second, rushed order shortly after the first
- Submitting low-resolution artwork without checking DPI first
- Skipping the proof review and missing a typo that ends up on every single card
- Forgetting about lead times when planning for events or product launches
Final Thoughts
Getting business cards printed for the first time doesn’t have to be stressful or expensive — but it does require a methodical approach. By working through these steps in order, you’ll arrive at a supplier, a specification, and an order that genuinely serves your business rather than one you settle for because the process felt overwhelming.
Business cards remain one of the highest-impact, lowest-cost branded items an Australian business can invest in. Treat the printing process with the same care you’d apply to any other business decision, and the result will be a card worth handing over with confidence.